CSV files, or comma-separated values, are a common way to store and share tabular data. They're often used to store time-related information, which can be represented using different formats. However, to effectively analyze and manipulate this data, converting timestamp columns into DateTime format is essential.
DateTime is a data type that represents both date and time information in a unified manner. It enables efficient manipulation and analysis of time-series data, facilitating tasks such as filtering, aggregation, and comparison.
The word "Timestamp" usually refers to the Epoch Unix Timestamp. Which is the number of seconds between the Unix Epoch (00:00:00 UTC on 1 January 1970) and a particular date.
In this guide, you'll learn how to parse and convert a CSV column with timestamp values into DateTime format. The guide focuses on the "Unix Timestamp" format, but the tool works with many other DateTime string representations.
Step 1: Load your CSV file
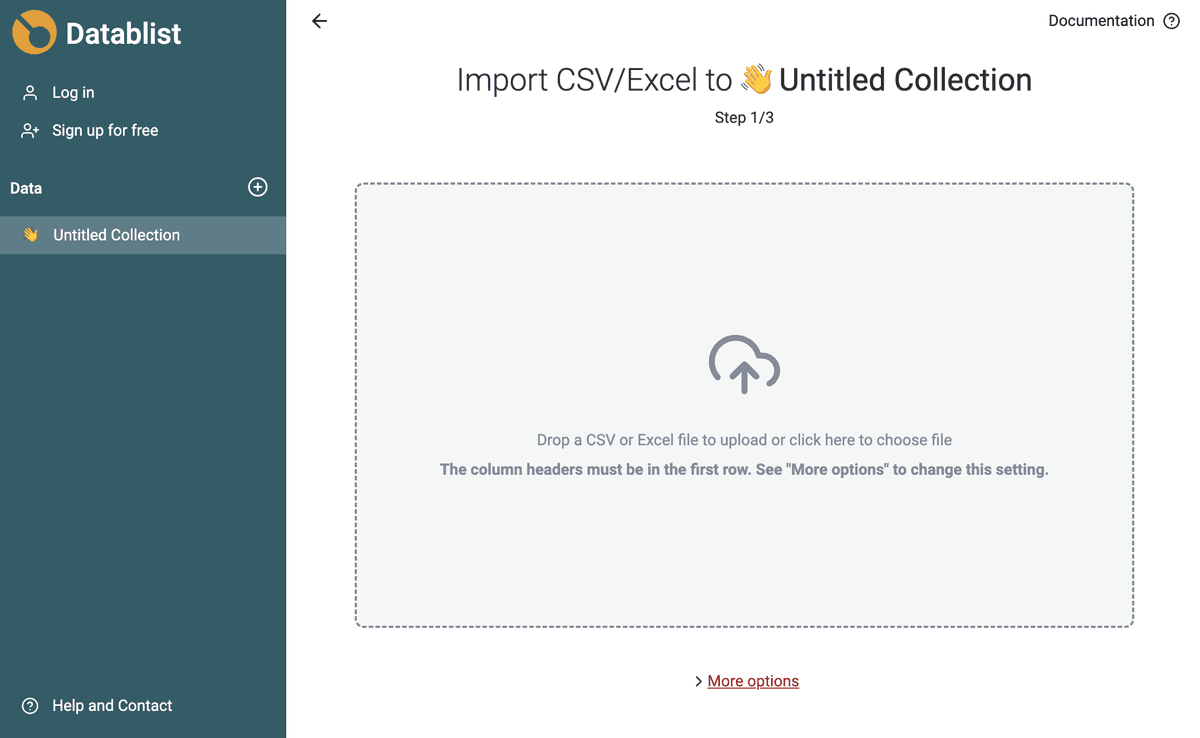
The first step in converting a CSV timestamp column into DateTime format is to import the CSV file into Datablist. Datablist is a powerful CSV editor with data-cleaning features. Perfect for this task!
Create a new collection ("+" button in the left sidebar) and then click "Import CSV" to load your file.
Once the CSV file has been imported into Datablist, you can proceed to the next step: converting the timestamp column into DateTime format.
Step 2: Use the "Text <=> DateTime" converter
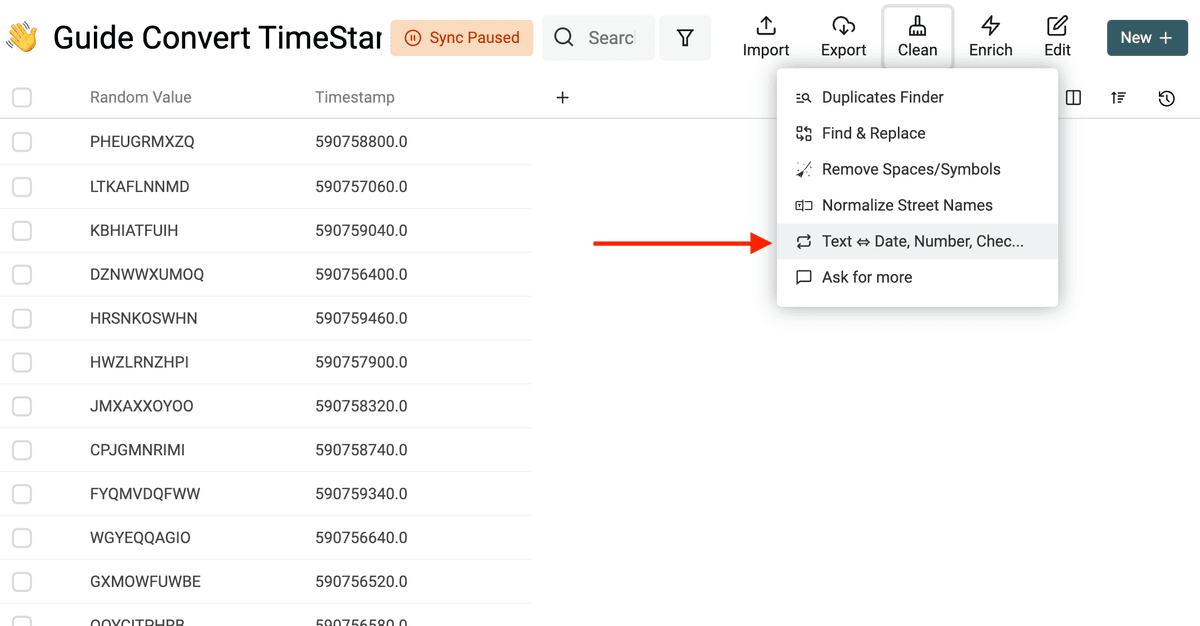
The next step is to convert the timestamp column into DateTime format. This can be done using the "Text <=> DateTime" converter.
Click on "Clean -> Text <=> Date, Number, etc."
It opens a data converter tool. The converter allows conversion between various types such as Checkbox, Number, DateTime and Text.
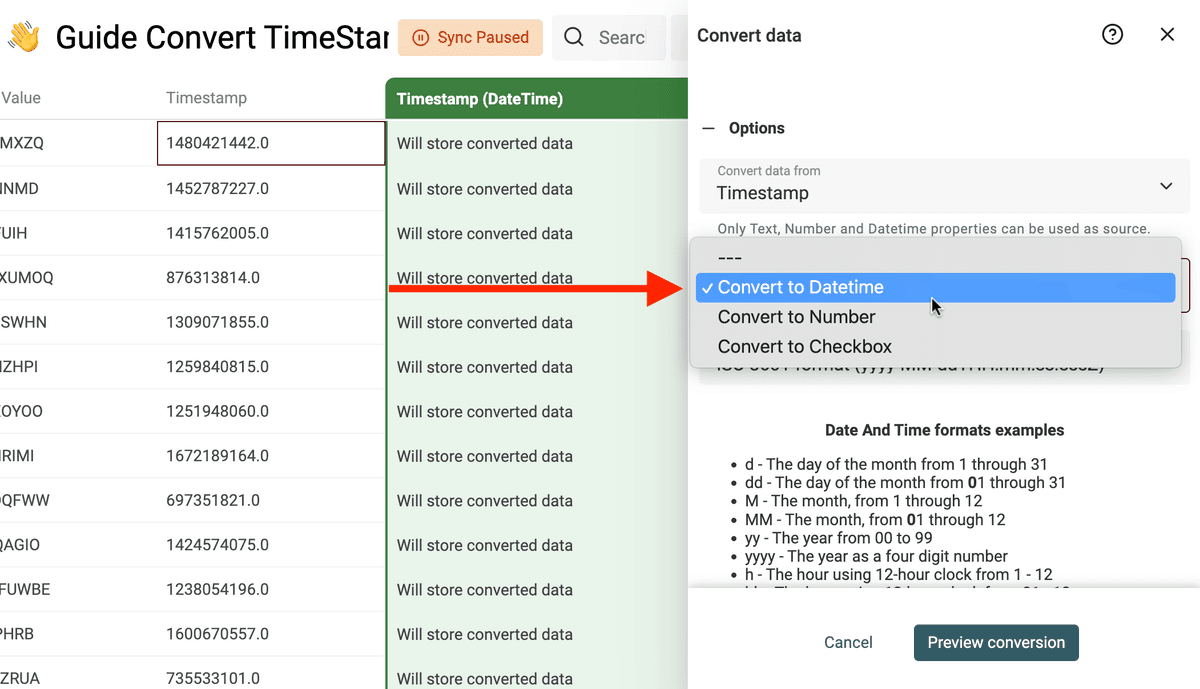
Select the column with the timestamp values in "Convert data from". Then, select the "Convert to DateTime" in the "Convert To" setting.
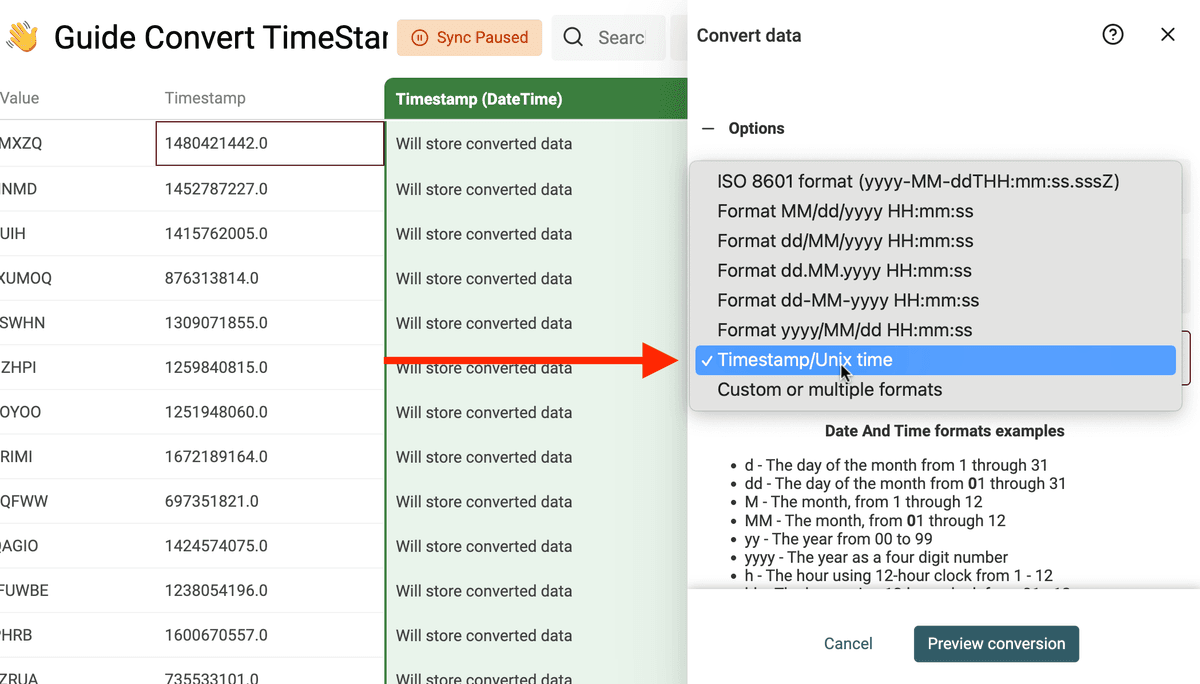
The last configuration step is to select the format in which your DateTime values are defined. Here, you have to select "Timestamp/Unix time" if your timestamps are Unix Timestamps. Check the different available formats otherwise. If none of the preset formats match your data, you can write one or more custom DateTime patterns.
Note
Datablist will automatically detect if the timestamp values refer to seconds or milliseconds.
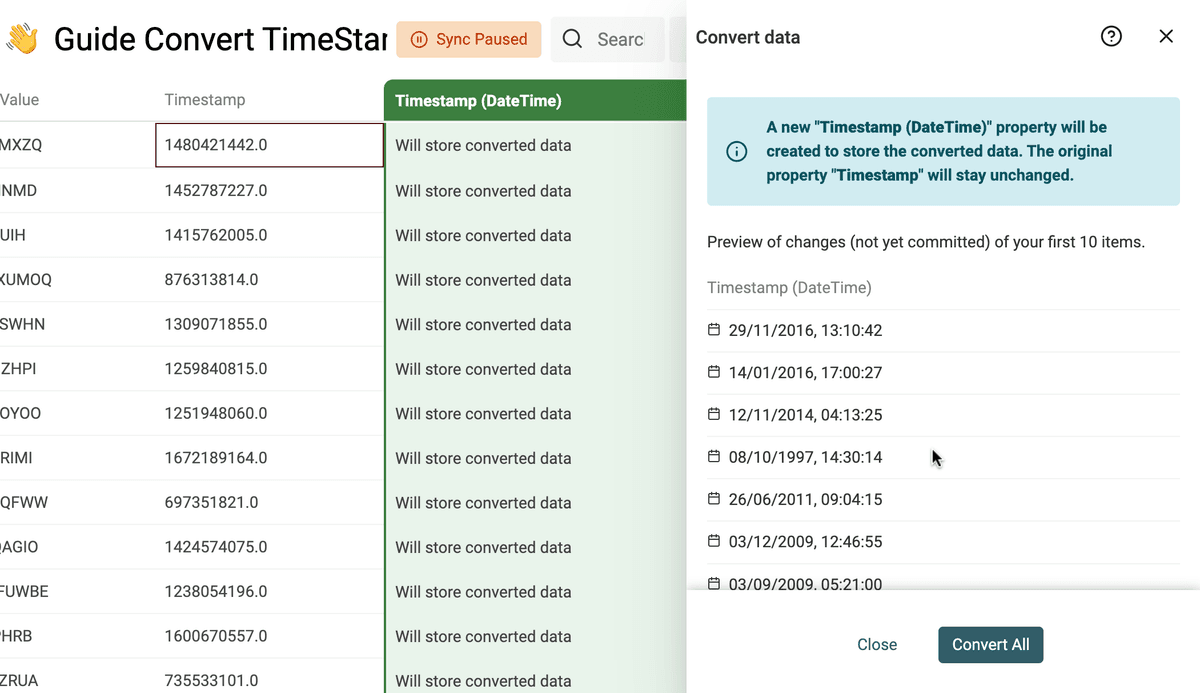
Step 3: Preview and conversion
Then you'll be presented with a preview of the converted data. This allows you to check that the conversion has been performed correctly and that the timestamps are now in the correct format.
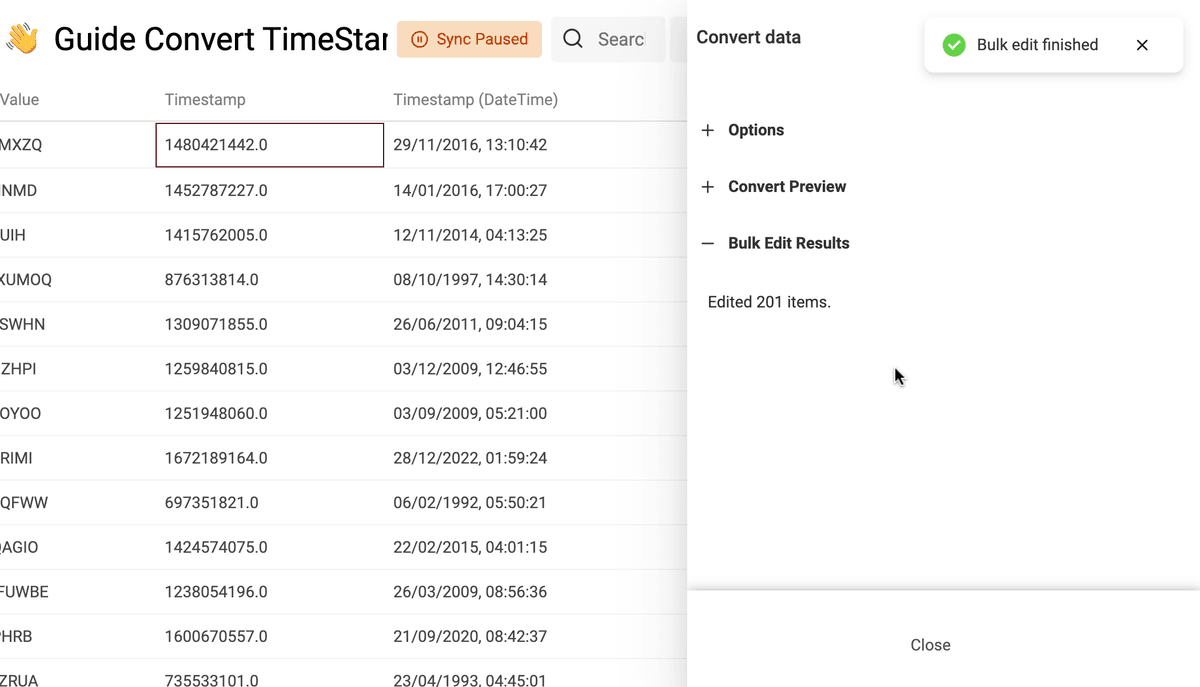
Once you've checked the preview and confirmed that the conversion has been successful, you can run the conversion. Datablist will create a new column to store the results. This will allow you to leverage the DateTime format to analyze and manipulate your data with more precision.
Note
If you need to convert back DateTime values to text in another format. Use the same converter tool with "DateTime => Text" settings.