Datablist provides powerful features to browse your items. Among them:
Full-text search
Searching through your items is simple. Datablist performs a full-text search on all of your item property values in seconds.
The search input is located in the collection header. A fast way to start a search is using the keyboard shortcut Ctrl + f.
Sort items
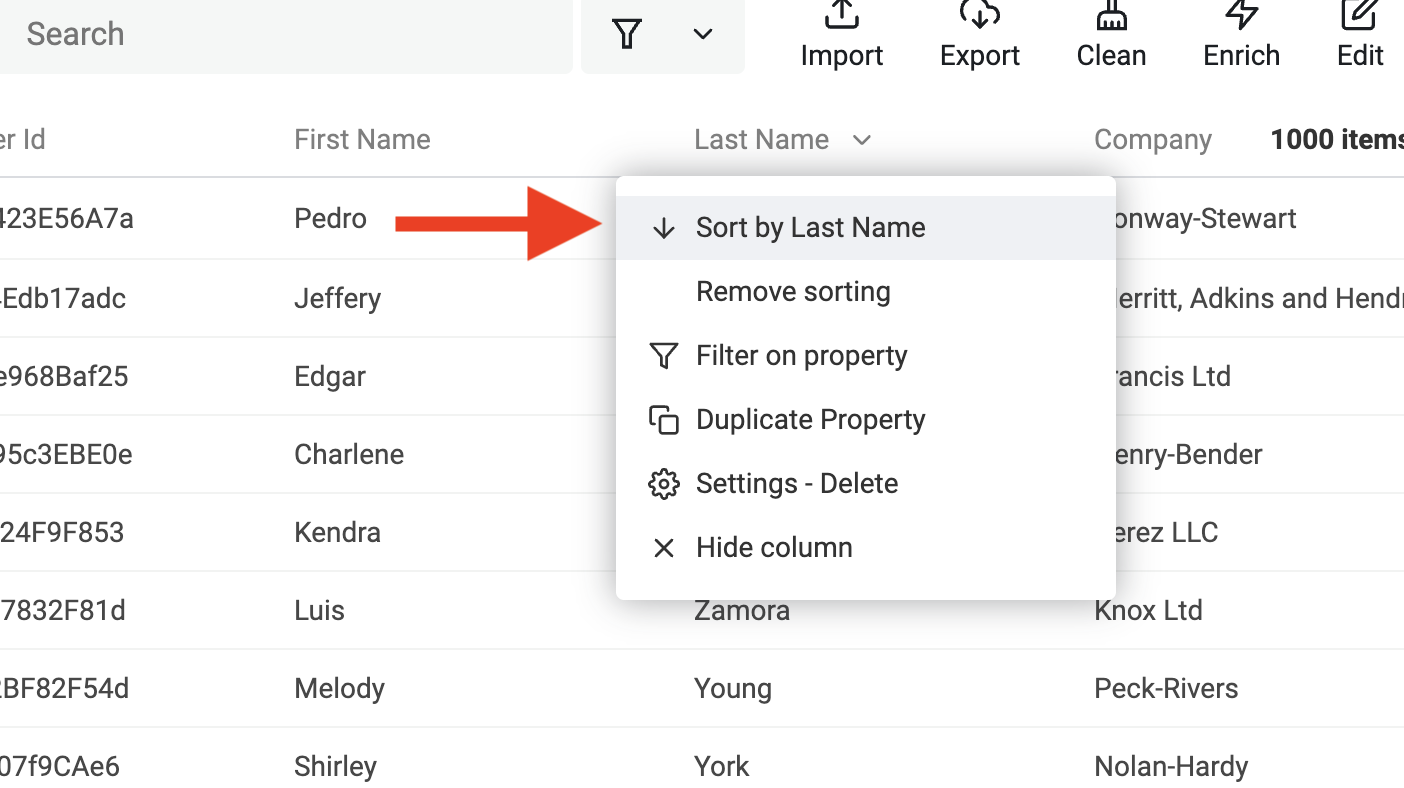
Items can be sorted on any visible property by clicking on the property column. Property values can be sorted in ascending or descending order.
Sort items using the drop-down menu available on each column.
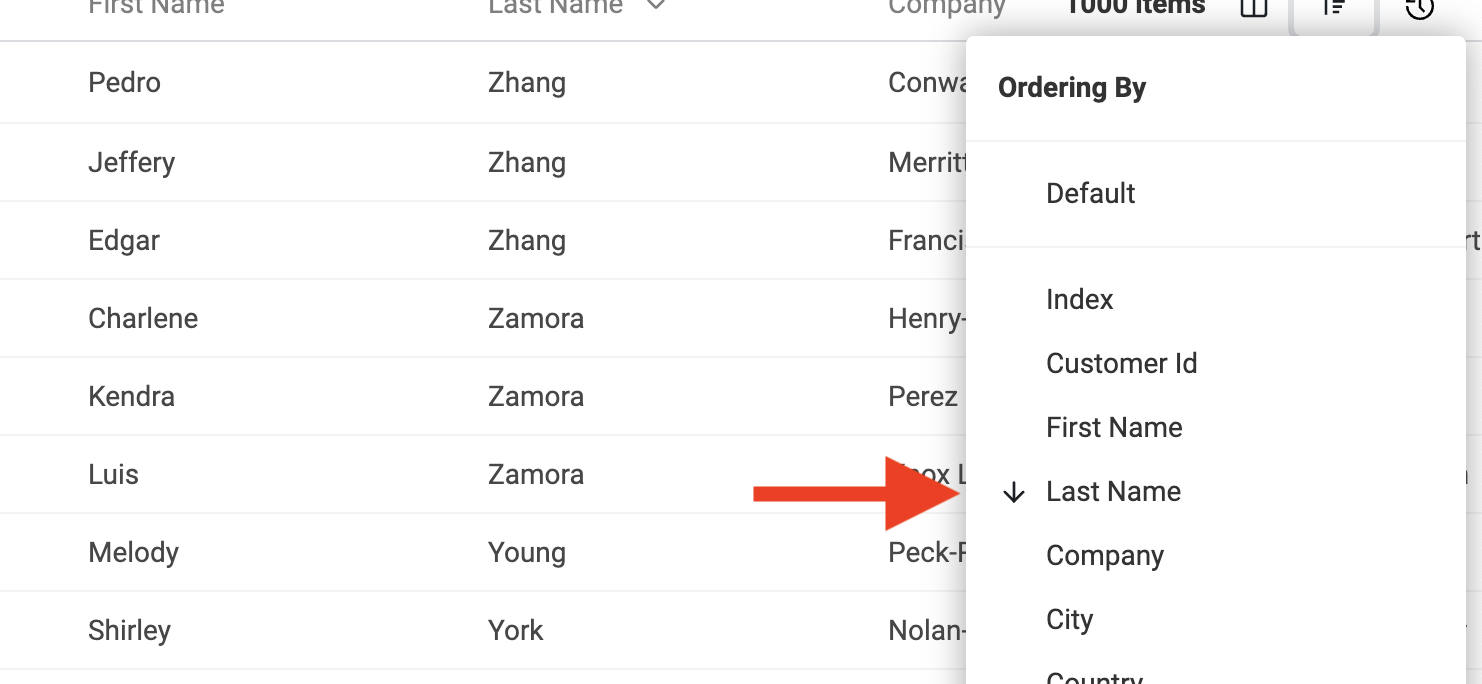
Or using the "Manage Order" button.
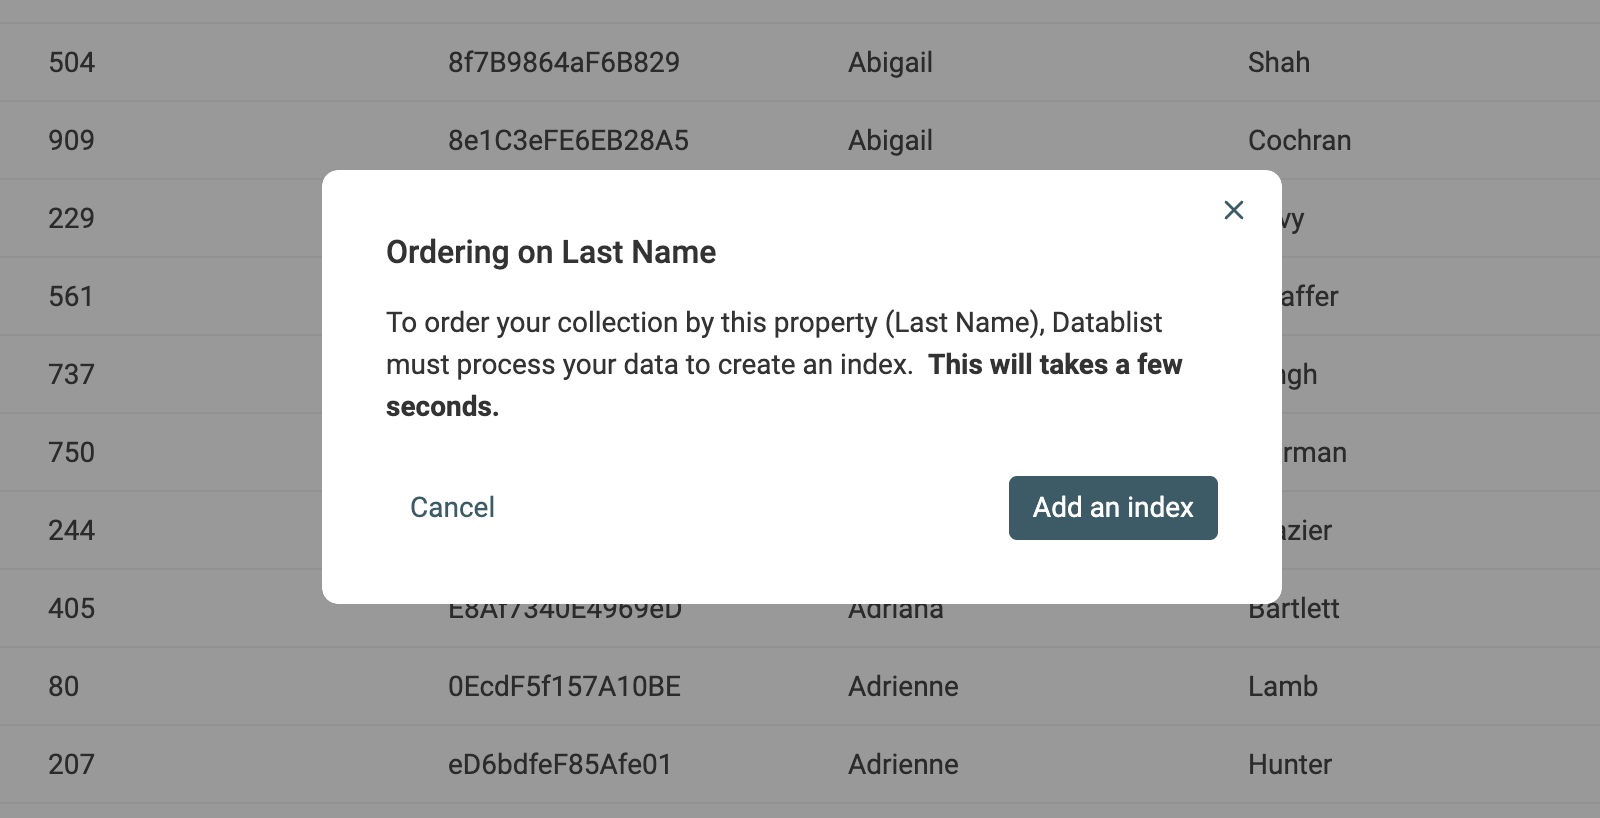
The first time you sort by a property, Datablist asks you to index your property data. Just click "Add an index". Datablist will process all the data from the selected property and create an internal index. This index will be then used to rank your items.
This index will be automatically updated when you add new items or update existing ones.
An arrow is shown next to the column name when a column is sorted.
Change sorting direction
To the change sorting direction, click again on the "Sort by XX" menu item.
Or from the "Manage Ordering" menu.
Remove sorting
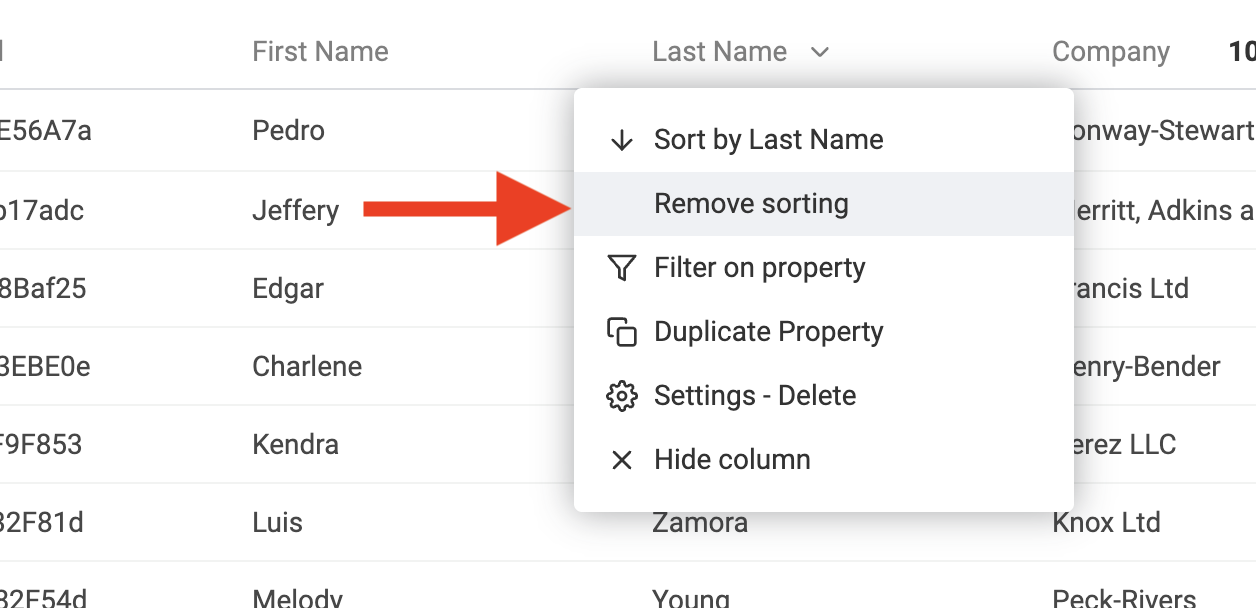
To remove any sorting condition and switch back to the default sorting, click on "Remove sorting" from the column menu.
Or click on "Default" in the "Manage Ordering" menu.
Notes
Order by default is a rank by newly added items.
Filter items
Full-text search looks for a term in all available properties. To filter your data on specific properties, use Filter Conditions.
Filtering is useful to:
- Find items that meet certain conditions
- Have a clean listing by excluding items
- Filter a CSV file to extract specific rows
Filtering works by creating filter conditions on one or several properties.
Add a filter condition
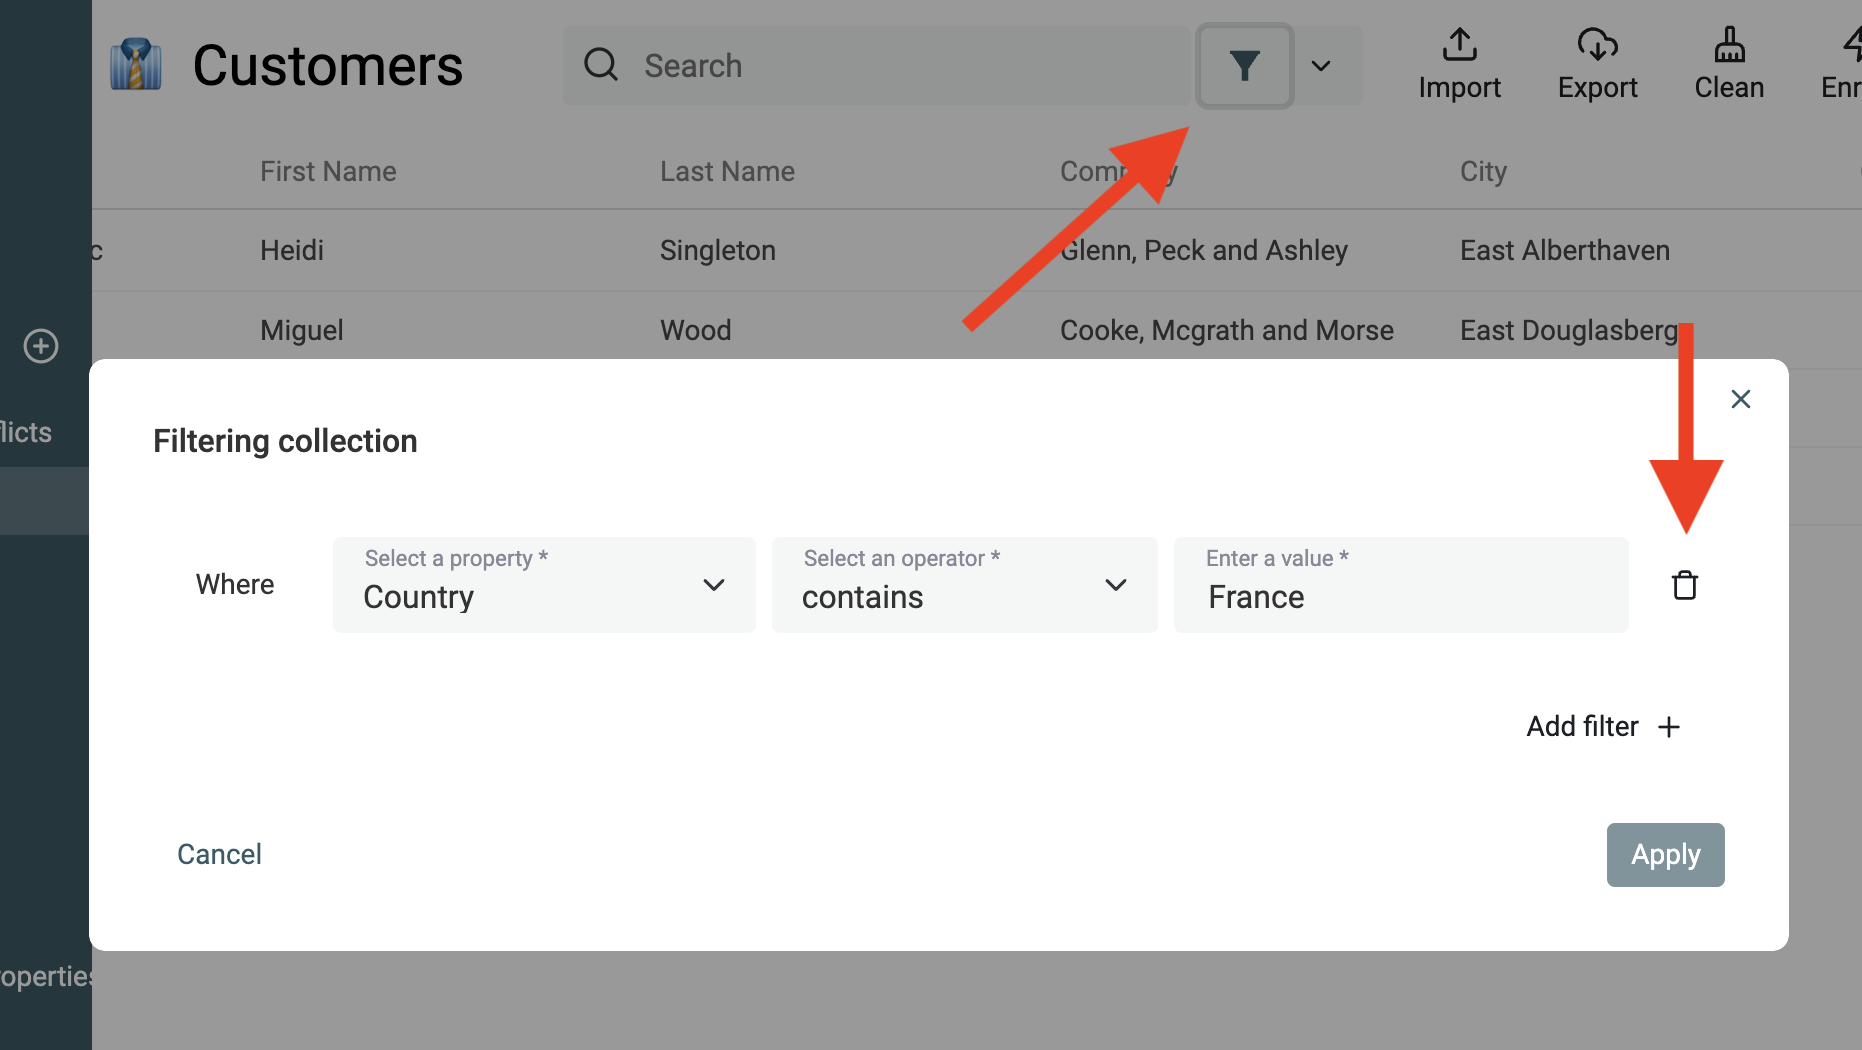
Add a filter condition by clicking the "Change filters" button in the collection header.
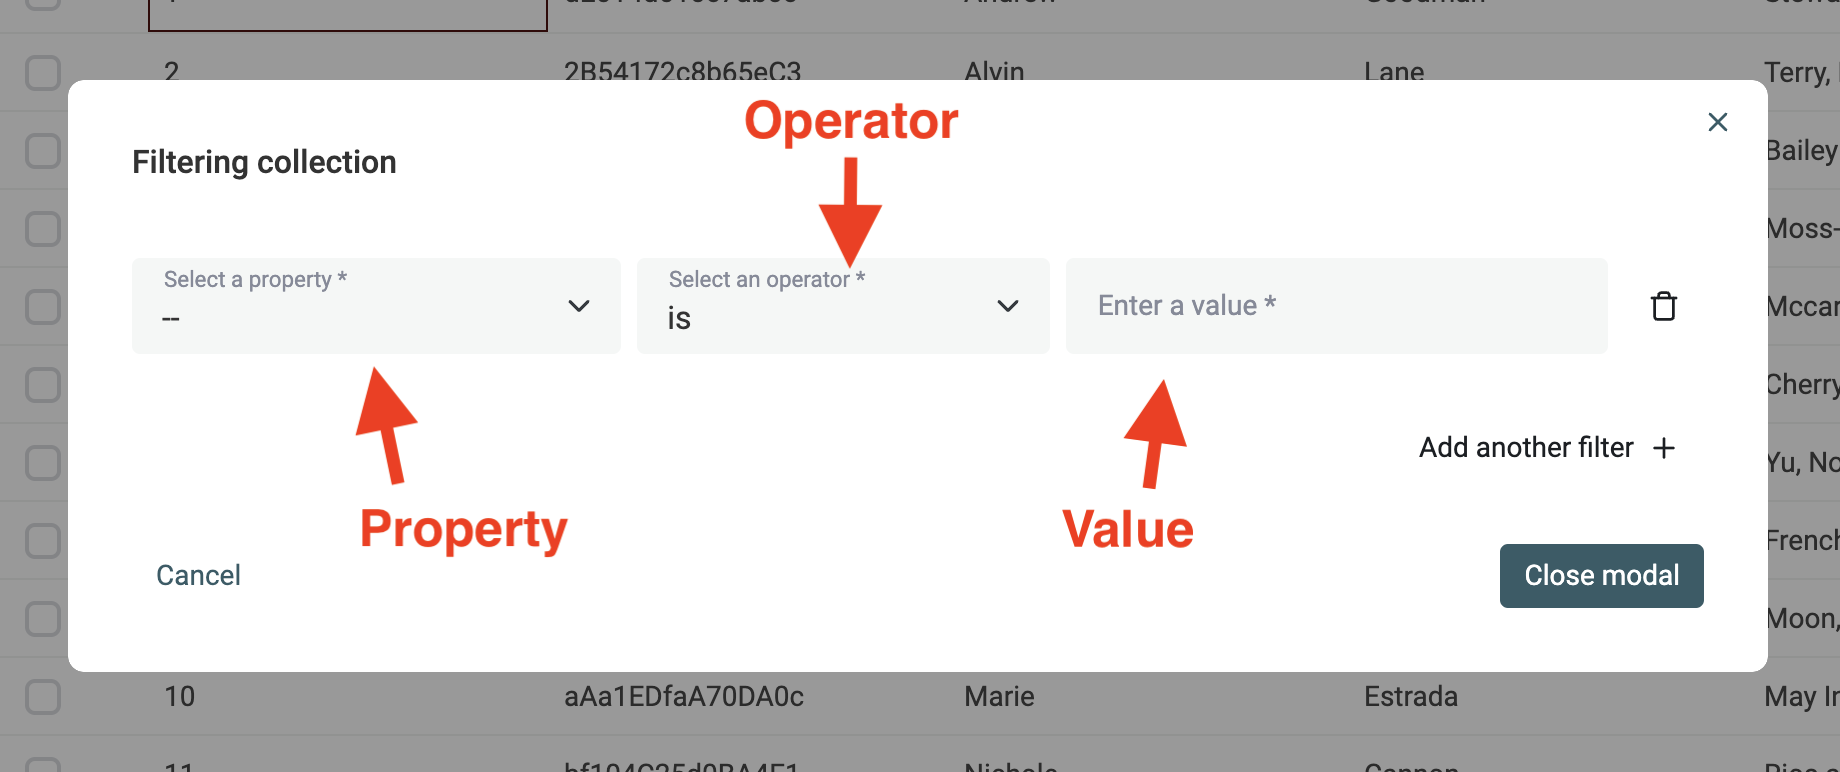
A filter condition is made of 3 elements:
- A Property - Any property in your collection.
- An Operator - The filter operator specifies how to compare the data with your filter value. Depending on the property data type, operators can be: contains, not contains, contains any, not contains any, startwith, endswith, in, not int, is empty, is not empty, numerical operators, date comparators, etc.
- A Value - The value to compare your item's property data against.
Note
Operators "is empty" and "is not empty" do not require a value.
Click the "Apply" button to run your filter condition against your collection items.
List of filter operators for Text
- is - Insensitive equal comparison. Leading and trailing spaces are not removed.
HeLLoandhellomatch (case insensitive)- " john " (notice the spaces) and
johndon't match
- is not - Opposite of "is".
- contains" - Insensitive text contains.
- The value
john@GMAIL.comwith the "contains" filtergmailmatches
- The value
- does not contain - Opposite of "contains".
- contains any - Return items that contain at least one of the comma-separated values. The comparison is case-insensitive.
- For example, a "contains any" filter with the value "marketing, sales" matches an item with the value "Head of Marketing".
- doesn not contain any - Return items that have zero match with the comma-separated values. The comparison is case-insensitive.
- For example, a "does not contain any" filter with the value "france, italy" matches an item with the value "Best of USA".
- startswith - Insensitive text starts with
- The value
+3302934092309with the "startswith" filter+33matches - The value
JOHN doewith the "startswith" filterjohnmatches
- The value
- endswith - Insentivice text ends with
- The value
john@GMAIL.comwith the "endswith" filtergmail.commatches
- The value
- in - Return items that match at least one of the comma-separated values. The comparison is case-insensitive.
- If the "in" filter is "France, Italy, Germany, USA". An item with the value "italy" matches.
- not in - Return items with values that match none of the comma-separated values. The comparison is case-insensitive.
- If the "not in** filter is "France, Italy, Germany, USA". An the item with the value "belgium" matches.
- is empty - Match on empty or only spaces text values
- " " (spaces) match
- "" match
- is not empty - Opposite of "is empty".
- regexp - Insensitive Regex matching. See below.
RegEx filtering examples
You can use a Regular Expression to filter your items. Text values that match against the Regular Expression are returned.
Note: Datablist adds the
i(case insensitive) flag to the Regular Expression.
For example, to find texts containing at least one digit, you can use the RegEx \d.
Here are some RegEx examples:
- Match texts with at least
5words:(?:\w+(?:\s|$)){5,} - Match valid email addresses:
^([a-zA-Z0-9._%-]+@[a-zA-Z0-9.-]+\.[a-zA-Z]{2,})$ - Match invalid email addresses:
^(?!([a-zA-Z0-9._%-]+@[a-zA-Z0-9.-]+\.[a-zA-Z]{2,})).*$ - Match valid URLs:
^(?:http(s)?:\/\/)?[\w.-]+(?:\.[\w\.-]+)+[\w\-\._~:/?#[\]@!\$&'\(\)\*\+,;=.]+$ - Match invalid URLs:
^(?!(?:http(s)?:\/\/)?[\w.-]+(?:\.[\w\.-]+)+[\w\-\._~:/?#[\]@!\$&'\(\)\*\+,;=.]+).*$
List of filter operators for DateTime
- is before - Compare the DateTime value with an absolute date and time.
- is before - relative - Check Relative datetime filtering
- is after - Compare the DateTime value with an absolute date and time.
- is after - relative - Check Relative datetime filtering
- is empty - Empty DateTime value
- is not empty - Opposite of
is empty
Relative datetime filtering
Relative Filtering works by comparing the date to the current day.
You define three parts:
NextorLast- A number
- A duration term: hours, days, months, years
For example: "Last 2 days".
List of filter operators for Numbers
- = - Equal to
- ≠ - Not Equal to
- < - Less than (strict) - Equal numbers don't match
- > - Greater than (strict) - Equal numbers don't match
- ≤ - Less than or equal to
- ≥ - Greater than or equal to
- is empty - Empty cell. 0 doesn't match.
- is not empty - Opposite of
is empty
Combining several filter conditions
Filter conditions work in AND or OR mode.
In AND mode, only items matching all filter conditions are displayed in your data table. In OR mode, items matching at least one filter condition are displayed in your data table.
Use the "Add another filter" to add another filter condition.
Filter conditions can be grouped into "Filter Groups". Filter Groups let you combine AND and OR modes.
For example, you can combine two filter groups with a AND mode. And inside each filter group, use OR mode.
Feedback Wanted!
Do you need more complex filtering? Please share your use case with us.
Remove filter conditions
The filtering button is renamed "Filtered" and the icon is full when the collection is filtered.
To remove a filter condition, open the filter modal, click the "trash can" button, and submit with the Apply button.
Saved Filters
With Saved Filters, you can save your current filters for quick access. This is useful to preserve complex filters that you frequently use. Or to create Segments of your data.
This simple feature will boost your productivity and help you manage your collections.
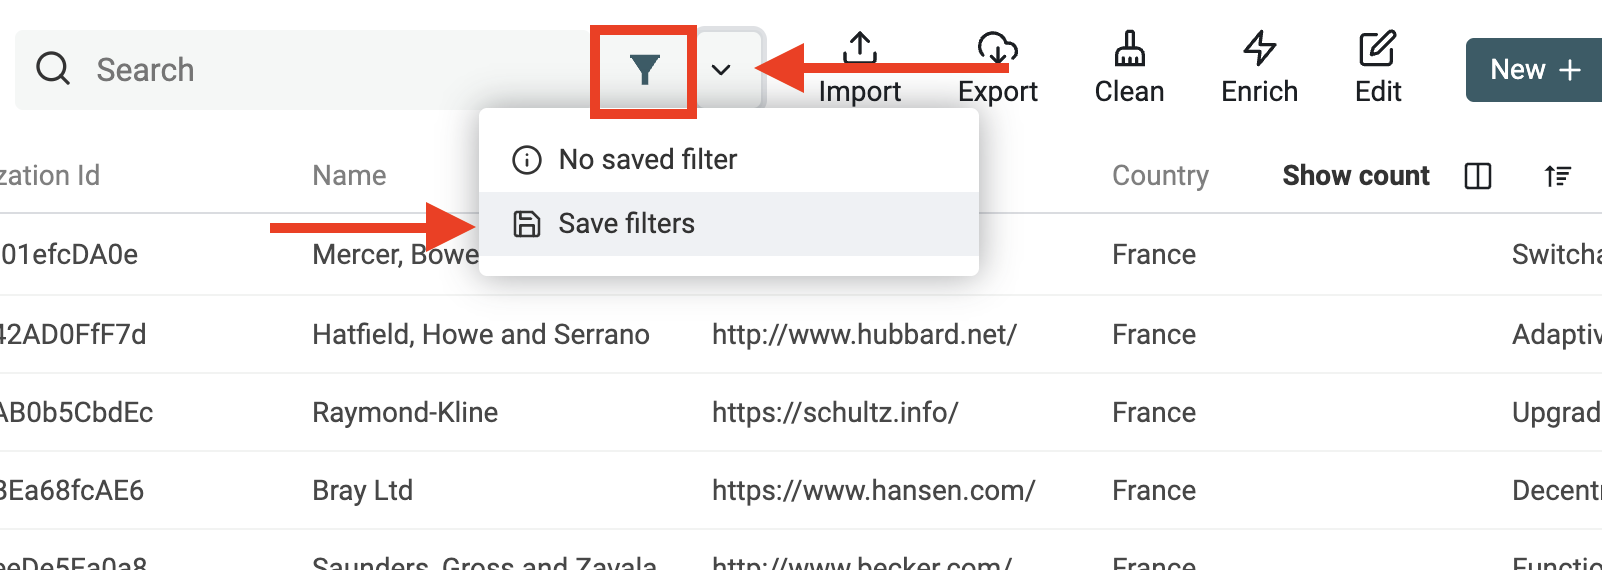
Saved Filters are accessible in the down arrow next to the filters button. And they are shared with your team members.
When you have at least one filter condition, a "Save filters" action is available to save them.
Notes
Saved Filters only store "filters" and not the full-text search term.
A save filter takes a name, and will automatically attach your current filter conditions to it.
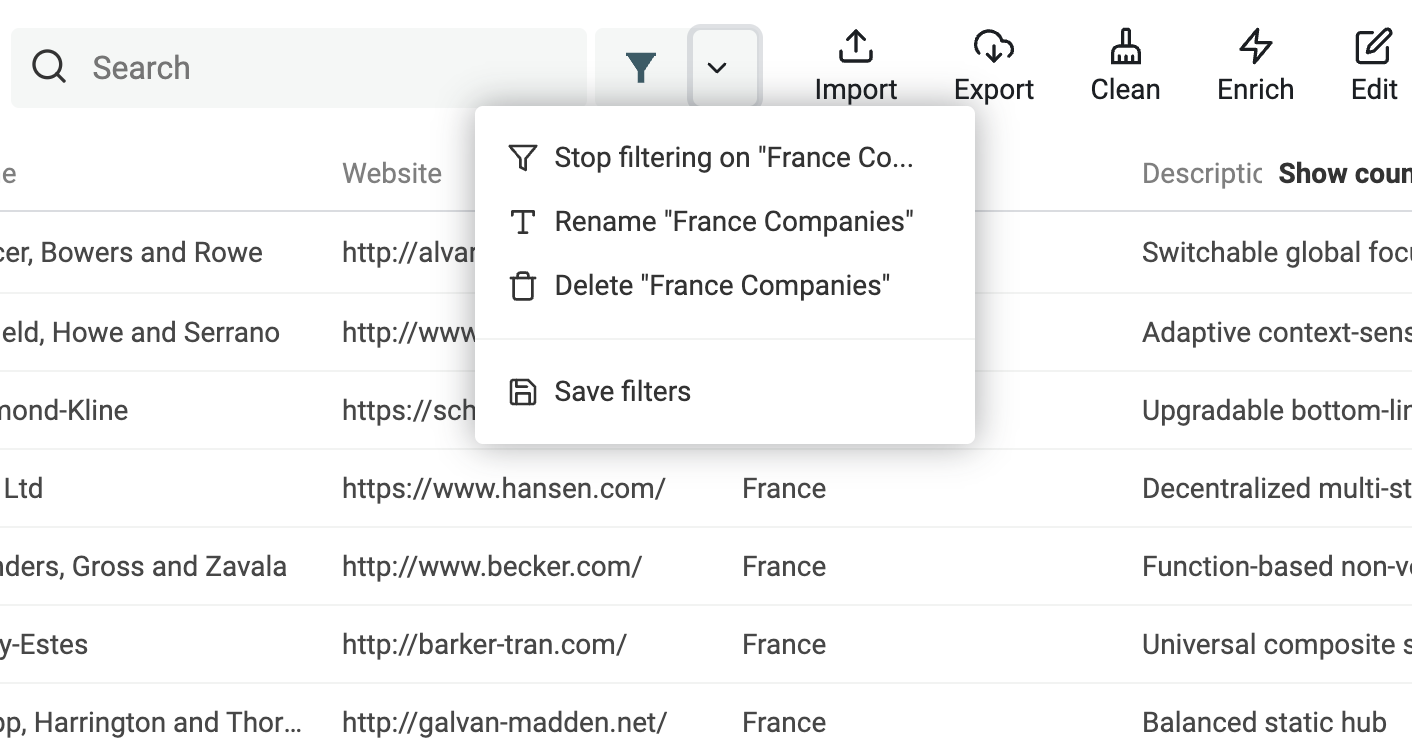
Once created, or after you select previously created "Saved Filter", the menu will change to display 3 actions:
- Stop filtering on "X" - This action clears the current filtering conditions. The Saved Filter is not edited. All the filtering conditions from the Saved Filter will be used once again when you select it.
- Rename "X" - To change the name on your Saved Filter. The name is only used to list them in the menu.
- Delete "X" - Delete the Saved Filter. This action cannot be undone.
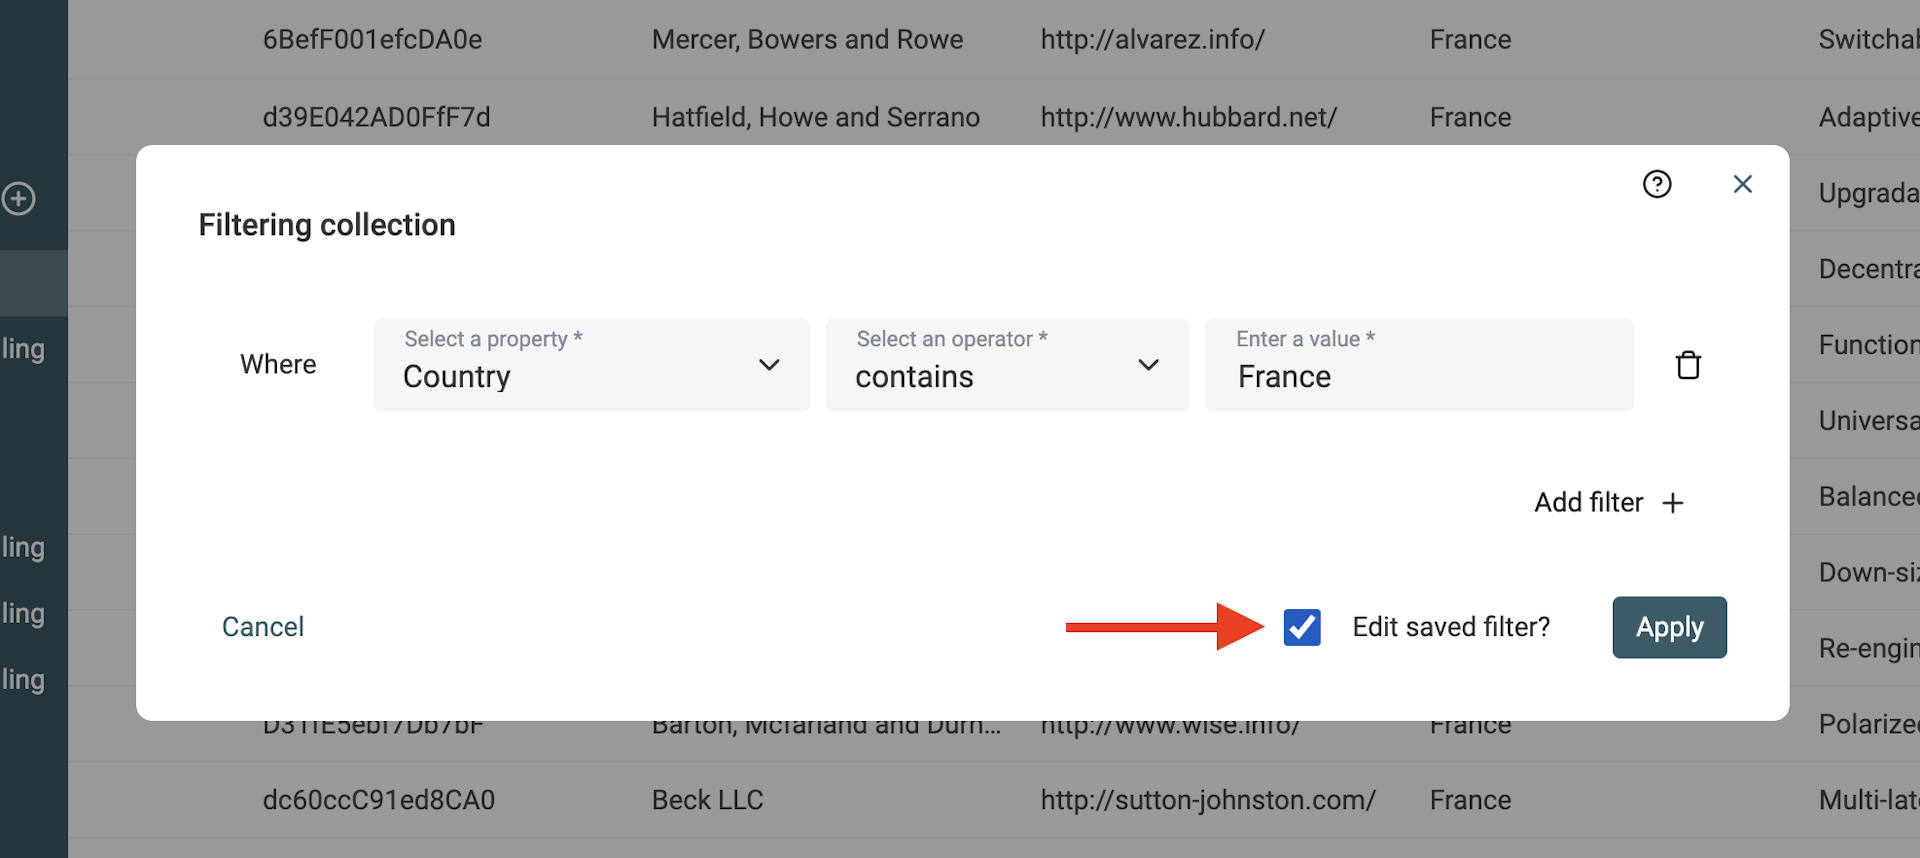
To edit the filtering conditions of a Saved Filter, open the filtering modal and add, edit, or remove conditions. Any change will display a "Edit saved filter" checkbox next to the "Apply" button.
Filtering on built-in properties
Datablist comes with built-in properties (createdAt, updatedAt) which can be filtered as any other property. To be able to create filter conditions on your built-in properties, you must add them to your collection properties. See our documentation on built-in properties.
Filtering and data export
The export button in the collection header exports the full collection items. To export only your filtered items, use the Select all checkbox and click the "Export items to CSV/Excel" button.


